

Understanding the process
“First principles: the fundamental concepts or assumptions on which a theory, system, or method is based.”
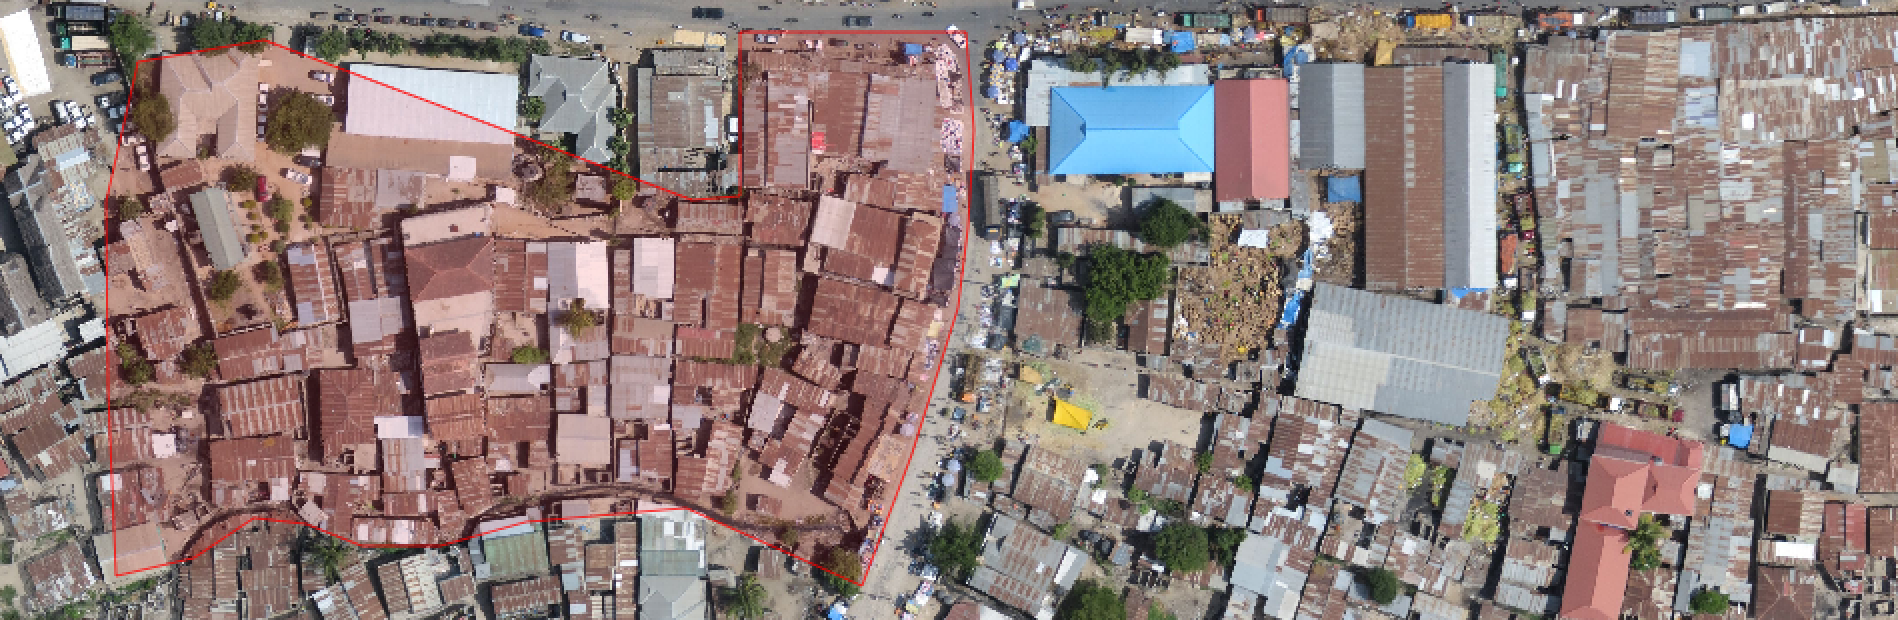
The purpose of this worksheet is to give you a small practical example of the workflows used in order to assemble the needed datasets to be used in InaSAFE. You will do some basic digitising activities, collaborate with your peer groups to exchange vital data needed to do the analysis and then perform two analyses in InaSAFE.
Scenario:
You are a disaster management team preparing for a flood in Tandale. To start with you need to divide yourselves into groups of four people. Each group must take on one of the rolls in the table below. This exercise can be done individually if required, in that case follow each of the group guides below in tern.
| Group | Task |
|---|---|
| Group 1: Planners | Using the aerial image as a contextual backdrop layer, create a wards layer that covers the whole of the Tandale image using the Planners requirements in the You try section below |
| Group 2: Buildings | Using the aerial image as a contextual backdrop layer, create a set of building polygons representing buildings in the Tandale using the Buildings requirements in the You try section below |
| Group 3: Flood | Using the aerial image as a contextual backdrop layer, create a set of polygon areas representing expected food depth in Tandale using the Flood requirements in the You try section below |
| Group 4: Streets | Using the aerial image as a contextual backdrop layer, create a set of street lines representing roads in Tandale using the Streets requirements in the You try section below |
You try:
Group Guides
Planners Group
- Create a new empty shapefile layer ( Layer>Create Layer>New Shapefile Layer) in which to digitise the ward polygons using the requirements below.
| Ward Layer | Requirements |
|---|---|
| Name | tandale_wards.shp |
| Type | polygon |
| Required attribute | TYPE |
| Attribute type | text |
| Attribute length | 80 |
| Notes | The boundaries can be fictitious and make sure the wards do not overlap |
- Capture all the wards in the tandale_imagery base map (enable Toggle Editing> click Add Polygon Feature> Digitise feature, finishing feature with right click> add information including type). Fictitious boundaries and names may be used.
- Plan the digitising work so that each team member captures one ward each and make sure they do not overlap.
- When all of the team are finished, share the data to one team member to combine the data into one layer.
- Once your layer is finalised, stop editing and use the InaSAFE keywords wizard to define appropriate keywords for the layer you have created.
- Share the streets data with the other groups in the disaster management team.
Buildings Group
- Create a new empty shapefile layer ( Layer>Create Layer>New Shapefile Layer) in which to digitise the building polygons using the requirements below.
| Buildings Layer | Requirements |
|---|---|
| Name | tandale_buildings.shp |
| Type | polygon |
| Required attribute | TYPE |
| Attribute type | text |
| Attribute length | 80 |
| Notes | When capturing your buildings, use one of the following categories in the TYPE attribute: Government, Place of Worship, Police Station, Residential, School, Supermarket |
- Capture all the buildings in the tandale_imagery base map (enable Toggle Editing> click Add Polygon Feature> Digitise feature, finishing feature with right click> add information including type).
- Plan the digitising work so that each team member captures a different section of the study area.
- Once your layer is finalised, stop editing and use the InaSAFE keywords wizard to define appropriate keywords for the layer you have created.
- Share the streets data with the other groups in the disaster management team.
Flood Group
- Create a new empty shapefile layer ( Layer>Create Layer>New Shapefile Layer) in which to digitise the building polygons using the requirements below.
| Floods Layer | Requirements |
|---|---|
| Name | tandale_floods.shp |
| Type | polygon |
| Required attribute | depth |
| Attribute type | decimal |
| Attribute length | 10 (with 3 decimal places |
| Notes | Make sure the flood areas do not overlap |
- Capture the flood areas in the tandale_imagery base map (enable Toggle Editing> click Add Polygon Feature> Digitise feature, finishing feature with right click> add information including type).
- Plan the digitising work so that each team member captures one flood area.
- Make a quick determination as to what depth each should be set to (use your best guess if you are not sure). Use the depth scheme in the table below.
| Not flooded | Low flood | Medium flood | High flood |
|---|---|---|---|
| 0 | 0.1 (i.e. 10cm) | 0.8 (i.e. 80cm) | 1.5 (i.e. 1.5 m) |
- Once your layer is finalised, stop editing and use the InaSAFE keywords wizard to define appropriate keywords for the layer you have created.
- Share the streets data with the other groups in the disaster management team.
Streets Group
- Create a new empty shapefile layer ( Layer>Create Layer>New Shapefile Layer) in which to digitise the road lines using the requirements below.
| Streets Layer | Requirements |
|---|---|
| Name | tandale_streets.shp |
| Type | line |
| Required attribute | TYPE |
| Attribute type | text |
| Attribute length | 80 |
| Notes | When capturing your streets, use one of the following categories in the TYPE attribute: Primary, Secondary, Tertiary, categorised Road, residential road, Cycle-way, footpath etc. |
- Capture all the streets you can see in the tandale_imagery base map (enable toggle editing> click add line Feature> Digitise finishing feature with right click> add information including type). Make a quick determination as to what TYPE they should be (use your best guess if you are not sure).
- Plan the digitising work so that each team member captures a different section of the study area.
- When all of the team are finished, share the data to one team member to combine the data into one layer.
- Once your layer is finalised, stop editing and use the InaSAFE keywords wizard to define appropriate keywords for the layer you have created.
- Share the streets data with the other teams in your group.
All groups
- When you have received all the hazard, exposure and aggregation datasets, run an analysis for each of the scenarios below
-
Run the InaSAFE ‘Impact Function Centric Wizard’, reading the instructions on each step carefully and make the most sensible choices (bearing in mind that all the data are already loaded in QGIS).
-
Flood on roads aggregated by wards
- Flood on buildings aggregated by wards
- Flood on people aggregated by wards