

Labelling in Context
“QGIS can display labels based on any attribute or expression. Labels can be used to emphasise and name places on the map and to explain things verbally which can't be explained with graphical elements”
In this module, we will look at how to use labels. We assume you already know the basics of labelling so we will focus on getting a bit more out of the QGIS labelling engine.
You try:
Goal: Create rule based labels for roads
- Load the 10m roads layer
- Enable rule based labelling
- Create a rule called 'Major roads' using the expression shown on the table, below
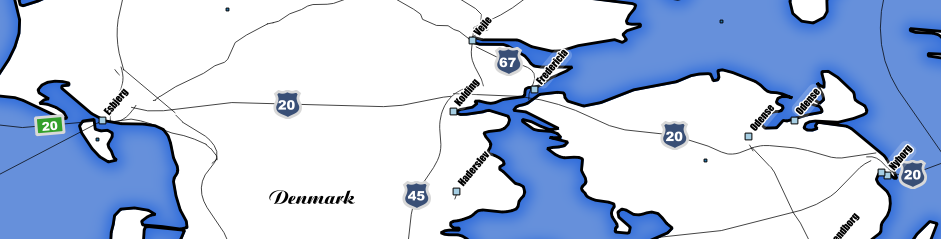
- Create shield labels for the major roads using the options shown on the table
- Create a rule called 'Other'
- Create a label style using green rectangles as per the options shown in the table and the image above.
| Name | Expectation |
|---|---|
Label with |
name |
Major roads |
CASE WHEN "type" = 'Major Highway' OR "type" = 'Beltway' OR "type" = 'Secondary Highway' THEN 1 ELSE 0 END |
Font |
Arial Bold, 13pt, White |
Background SVG |
background_security.svg |
Background size |
12mm (tweak as needed) |
Background colour |
#394f76 |
Background outline colour, border width |
#d8d8d8, 1 symbol unit |
Rotation |
0 |
Placement |
Horizontal |
Other |
ELSE (just enter ELSE directly in the rule expression without using the expression editor) |
More about
In order to do sensible labelling (i.e. labelling that is clear and relevant) you should pay particular attention to these things:
- Scale based visibility - show labels only when the scale is large enough for them to be meaningful.
- Collision avoidance - QGIS does a good job of avoiding colliding labels by default, but you can define custom behaviours that will do an even better job. Investigate the options in 'Rendering' and 'Placement' in particular.
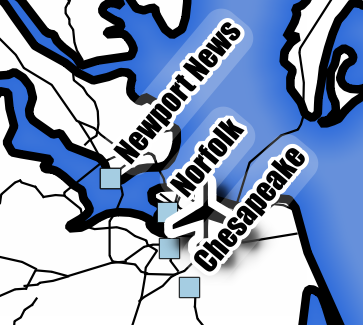
- Visibility - if there is a chance that you will have dark labels on a dark background (or light on light), use text buffers or label backgrounds to ensure sufficient contrast. The image on the left shows the use of both.
Label text can be defined using an expression. This gives you a lot of freedom to compute label based on multiple attributes, or even features in another layer.

Check your knowledge:
-
What will this example expression produce if used in the 'label with' option?: x(centroid($geometry)) || ',' || y(centroid($geometry)):
- The x and y coordinates if the feature being labelled is a point layer, otherwise nothing
- The sum of the x and y coordinates of the current feature
- The coordinates of the center point of a line or polygon if the layer is a line or polygon layer, otherwise the x, y of a point
-
Which of these expressions would change the label to red if the major road is a toll (try each one on the text color property to see):
- if (toll = 1, color_rgb( 255, 0, 0), color_rgb(255, 255, 255))
- if (toll = 1, red, white)
- CASE WHEN toll=1 THEN color_rgb( 255, 0, 0) ELSE color_rgb(255, 255, 255) END
